Landing Nets
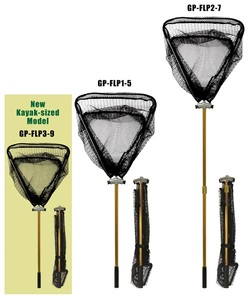
So....We've set our drag properly. We've hooked into a nice black drum who's put the strength of our line and knots to the test and gave our drag system a nice work out and we've still managed to get it to the kayak. Now, how are we going to get that beast in the boat and get a picture to prove to the world we did it? We have our landing net in position already, right? Landing net? What landing net? The one that we're going to invest in after RG told us how important they are to get the "one that got away" from getting away.
RG recommended a collapsible net with an adjustable, retractable handle with a rubber mesh netting. The collapsible option is for the ease of portability, the retractable handle option is because kayak anglers have to manage their rod with one hand and net a fish with the other. The longer the net's handle, the easier it will be to manage this task from a distance. The rubber mesh should really be a requirement instead of an option. This material is just easier on the fish itself. Most of these net manufacturers now have some special products specifically designed for kayak anglers. Check out casteliaoutdoors.com for great, high-quality landing nets.
RG recommended a collapsible net with an adjustable, retractable handle with a rubber mesh netting. The collapsible option is for the ease of portability, the retractable handle option is because kayak anglers have to manage their rod with one hand and net a fish with the other. The longer the net's handle, the easier it will be to manage this task from a distance. The rubber mesh should really be a requirement instead of an option. This material is just easier on the fish itself. Most of these net manufacturers now have some special products specifically designed for kayak anglers. Check out casteliaoutdoors.com for great, high-quality landing nets.
Proper Technique
Now that we have our net ready....what's next?
RG shared a few pointers that will help make landing a fish easier.
A: The net should always be in the water before the fish is in it
B: It's best to lead the fish into the net (as the video below demonstrates)
C: Once the fish is in the net, turn the handle toward the sky for an easier lift out of the water. This will keep the net handle from bearing all of the weight of the fish (especially if it's a big one).
De-Hooking
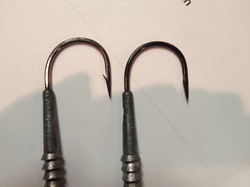
Catching and boating a fish are the rewarding parts of fishing. Getting the hook out of its mouth, or even worse, its belly, is the stressful part, especially if you're new to the sport. To make it as easy as possible to dehook a fish, RG suggested smashing the hook barbs down. The barb was really designed to keep a piece of bait, like a live shrimp, from slipping off during a cast, it was never intended to be used to secure a catch, that's why you are reminded to always keep your line as tight as possible, that serves to keep the hook from slipping out. A barbless hook is an easy hook to remove and a quick dehook means a quick re-release.
Release
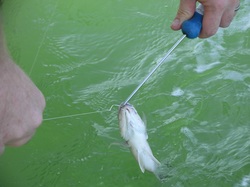
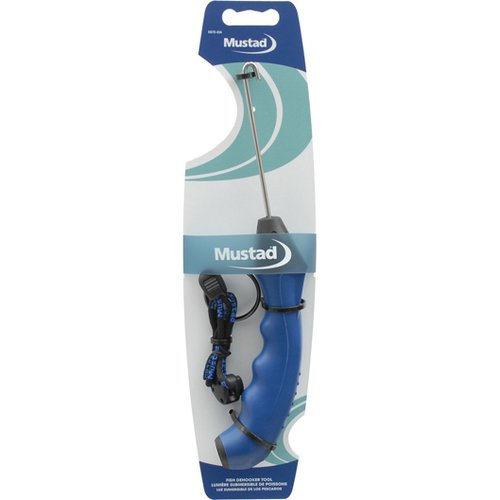
Releasing a fish back into the water is the most important aspect of a fish's survival rate. This 15 second action can be the cause of a fish's death or survival. First off - Never, never, never use dry hands when handling a fish. The slime coating on a fish is its only means of protecting itself against deadly bacteria in the water. Always make sure your hands, gloves or the towel you're using are wet. Honestly - if the fish is too small and you know you're going to have to release it anyway, there's no point in even netting it and putting it through the extra stress of boating it. Why not just dehook and release it as soon as you get it close enough to do so? You don't even have to touch it if you use a special dehooking device like the one below.
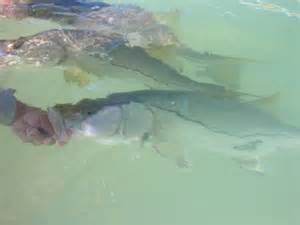
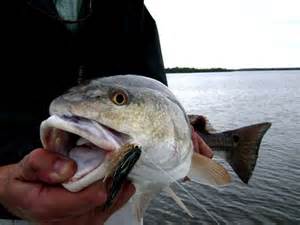
There are a few saltwater species that will do no harm to your fingers if you get them near or in the fish's mouth. Two of these are redfish and snook. Being able to safely 'lip' these fish makes it even easier to dehook them.
Swim and be Free !!!
This little fish trait also makes it easier to revive and release them. Once you have removed the hook and taken a picture of your prized fish the final step is to let them go in survival mode. A chemical called lactic acid builds up in a fighting fish and depletes it of energy. If the fish is traumatized further by a lengthy dehooking and photo taking process, it may die. Getting it back into the water ASAP is essential. But even more important than getting it in the water is making sure it's facing the right direction. Look at the direction that leaves or debris is flowing on top of the water. Look at the direction the grass is facing on the bottom. If the current is flowing east, the fish's mouth should be facing west. If the current is flowing south, the fish's mouth should be facing north. This position allows fast moving water to naturally flow through a fish's gills even when it's being held in a stationary position. You may have to hold the fish for several minutes and keep an eye on its gills, making sure that they're moving naturally. When the fish makes a sudden lunge to break free of your hold then it may be time to let it go. Best, though, to hold it in the current for a few more moments until you know for sure that it's ready to move on. If it's released to early it's especially venerable to predators that may take advantage of it's weakened state so make sure that it's ready to fend for itself when it's released.
If your release happens to be in a place or at a time where no current is flowing, then you must take it upon yourself to improvise and make an artificial current by "pushing" the fish through the water in one direction only. DO NOT "push-and-pull" a fish under water. Push the fish forward under water a foot or two....lift it out of the water slightly, reposition it so that you can push it forward under the water another foot or two. Repeat this process until you have a revived fish. Again...DO NOT pull a fish backward under water!!!!
If your release happens to be in a place or at a time where no current is flowing, then you must take it upon yourself to improvise and make an artificial current by "pushing" the fish through the water in one direction only. DO NOT "push-and-pull" a fish under water. Push the fish forward under water a foot or two....lift it out of the water slightly, reposition it so that you can push it forward under the water another foot or two. Repeat this process until you have a revived fish. Again...DO NOT pull a fish backward under water!!!!
Door Prizes

At the end of the meeting, RG gave away two scales for testing drag setting at home. Congratulations to Sue and Sondra for being the two lucky winners !!
Big THANK YOU to RG Schmidt
RG has been our biggest supporters and mentors since this group formed a little over a year ago. We appreciate his willingness to share his years of angling expertise with us, helping us learn to become better anglers.
 RSS Feed